
The WordPress login page is often the first thing your clients see. With the free Login Customizer in Ultimate Dashboard you give it your logo, background and colors, with a live preview in the WordPress Customizer. No code needed. PRO adds two more layouts.
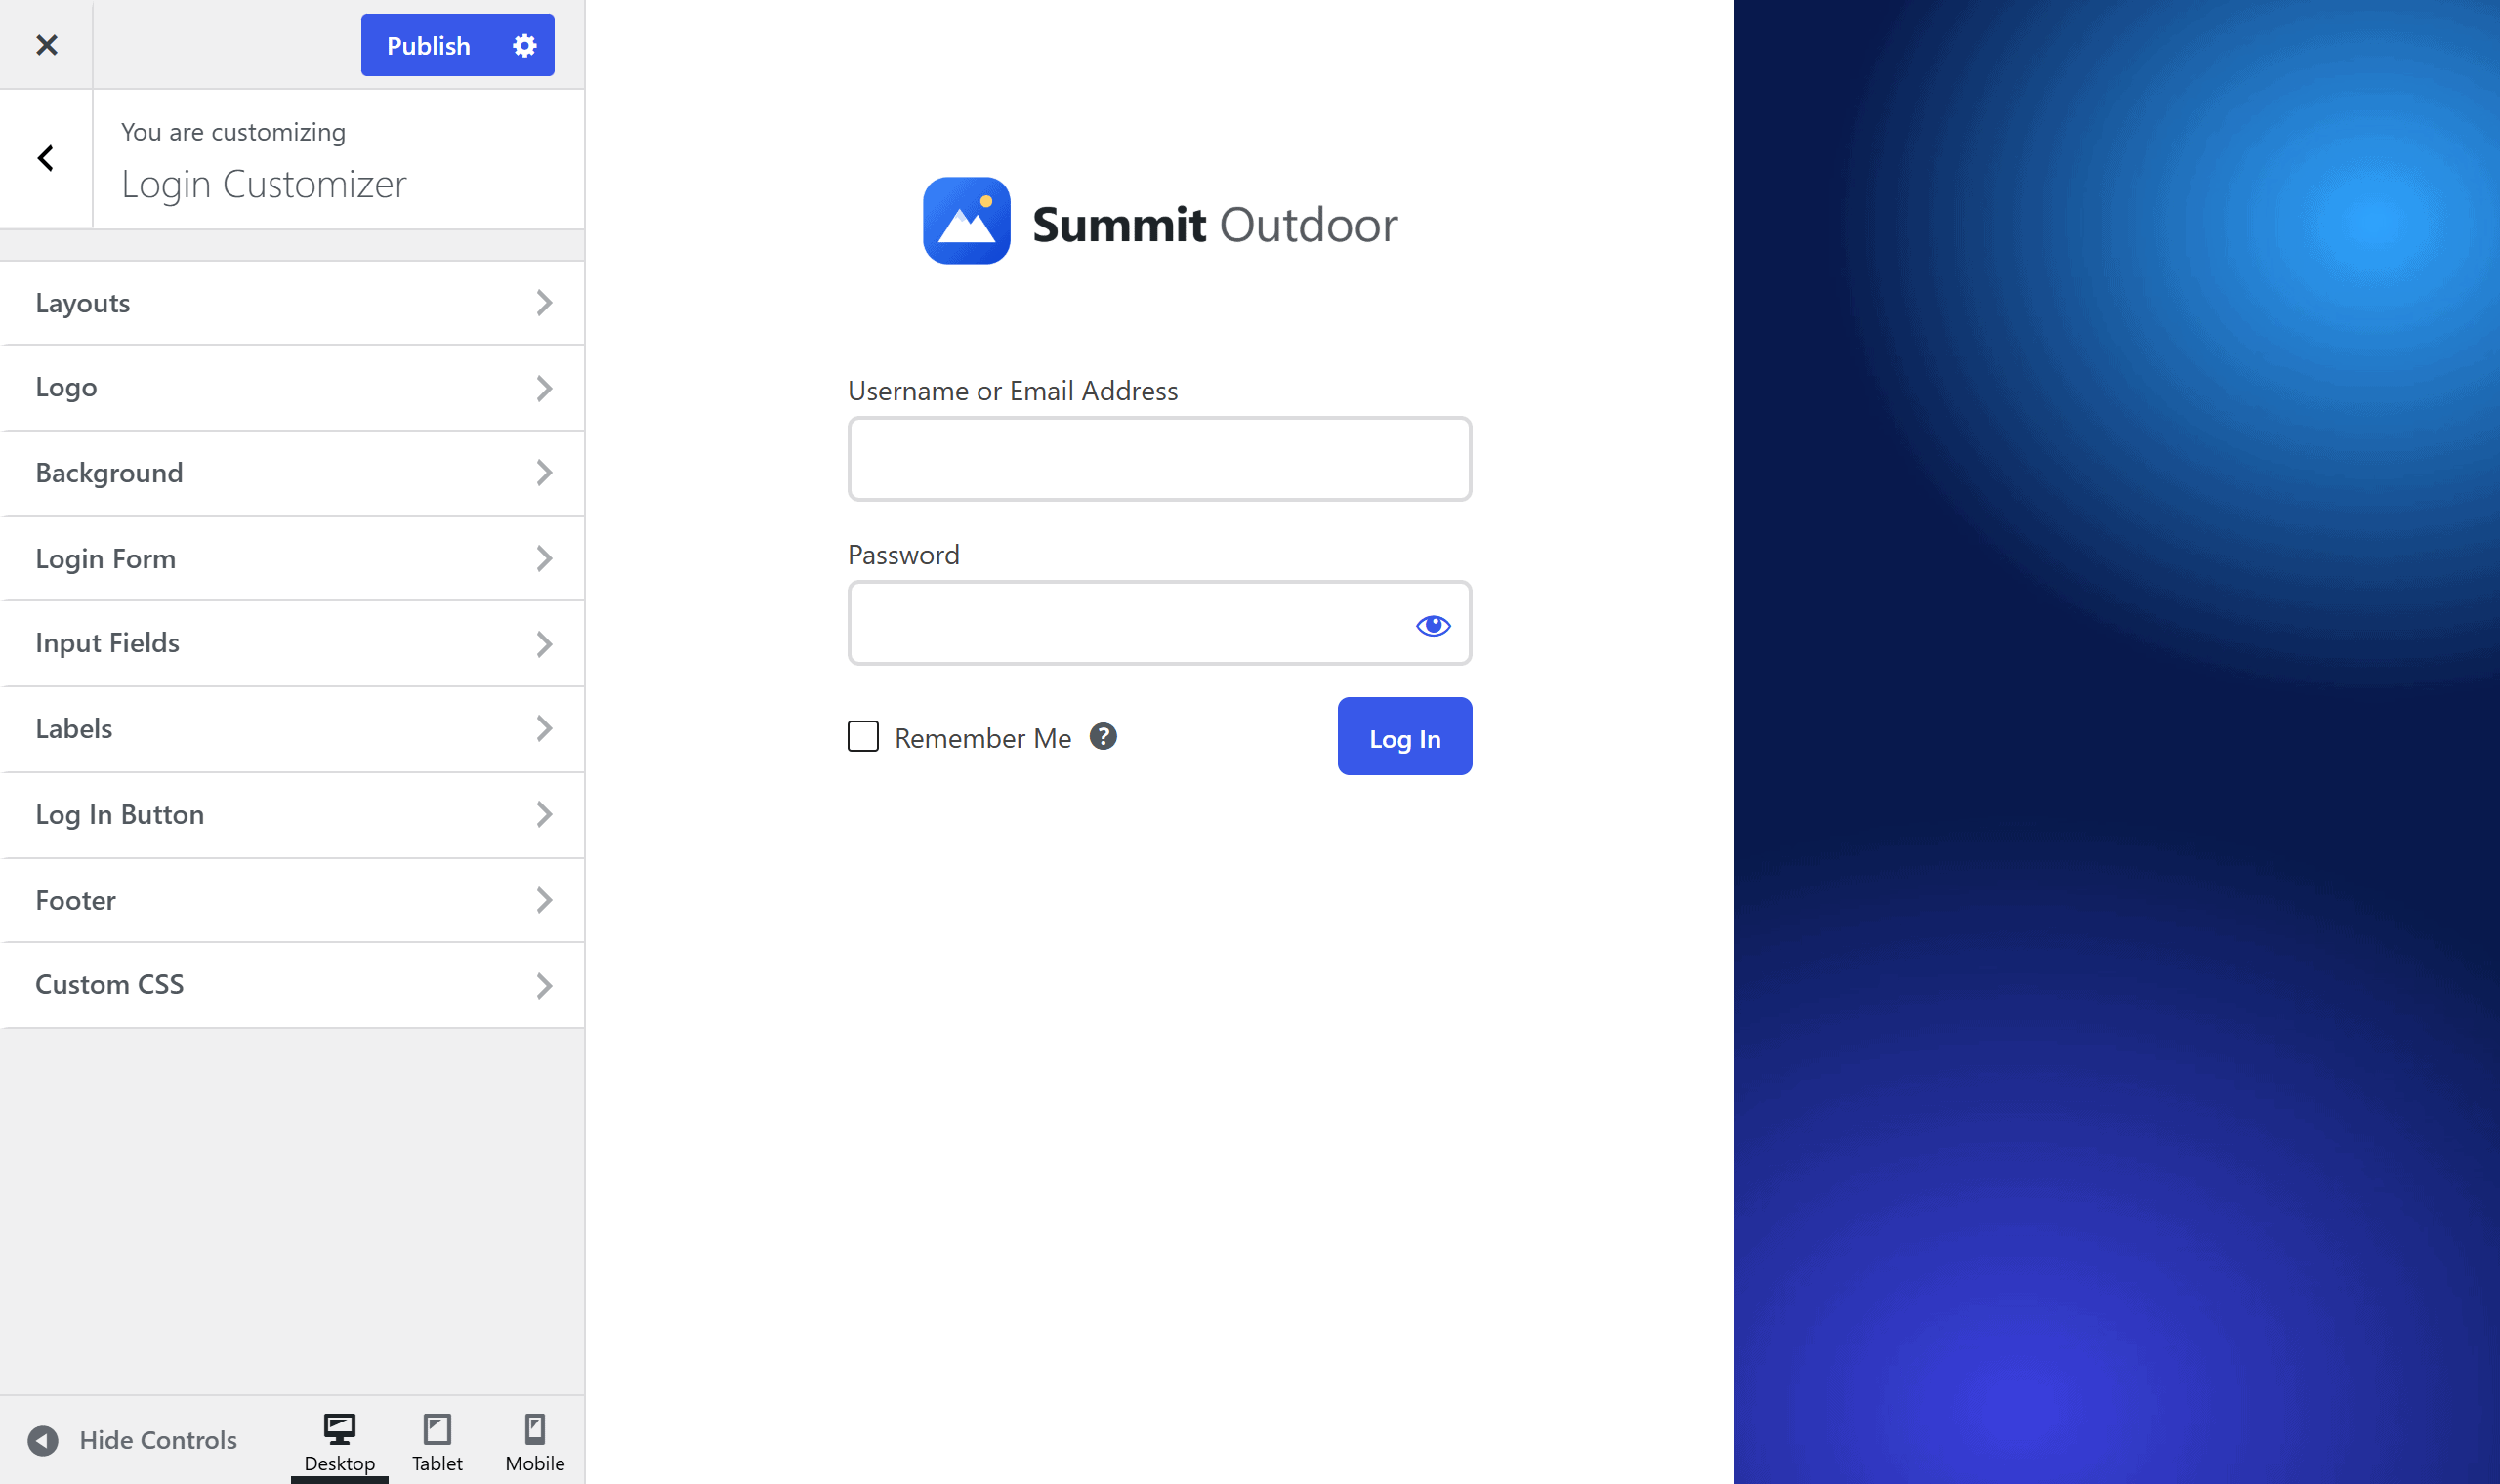
Customize the login page
- Go to Ultimate Dash… → Login Customizer. The WordPress Customizer opens with a preview of your login page.
- Work through the sections (see below). Every change shows up in the preview right away.
- Click Publish.
Step-by-step guide with examples: how to create a custom WordPress login page.
What you can customize
- Logo: your logo instead of the WordPress logo, its height, link and title.
- Background: a color or image, with position, size and an overlay color.
- Login Form: background, width, padding, border, rounded corners and shadow.
- Input Fields and Labels: height, font size, colors and borders, also when a field is selected.
- Log In Button: size, rounded corners and colors, also on hover.
- Footer: link colors, and remove the “Lost your password?”, “Back to website” links and the language switcher.
- Custom CSS: anything else.
PRO: left & right layouts
With Ultimate Dashboard PRO, the Layouts section offers two more layouts: the login form on the left or the right side of the screen, next to your background image, with an adjustable box width.
Turn off the Login Customizer
Using another plugin for your login page? Go to Ultimate Dash… → Modules and switch off Login Customizer. Your login page goes back to the WordPress default.
Developers can also turn it off in code, for example from the child theme’s functions.php:
add_filter( 'udb_login_customizer', '__return_false' );“404 page not found” when opening the Login Customizer
Go to Settings → Permalinks in your WordPress admin and click Save Changes without changing anything. That refreshes WordPress’ links and fixes the error.