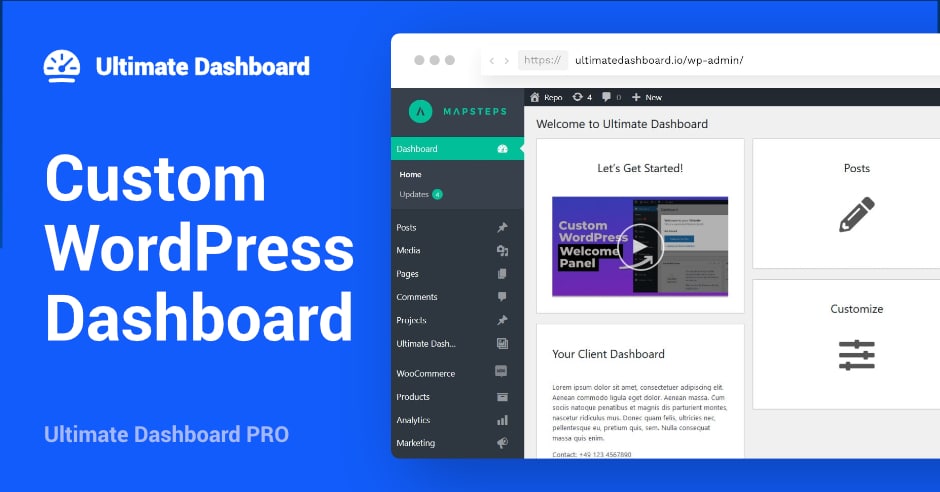
How to Create a Custom WordPress Admin Dashboard
Are you looking for a way to create a custom admin dashboard on your WordPress website?
A custom admin dashboard gives your clients or third-party users such as bloggers or freelancers a more personalized experience.
Since it is the first screen you or any other user will see after logging in, it needs to hold vital information about the website rather than plugin updates information or upcoming WordPress events.
An ideal custom-built WordPress admin dashboard has custom-tailored Admin menus, Admin bars, and even custom styling.
Whether your goal with customizing the dashboard is to change the colors or add or remove widgets for easier workflow, you’ll learn how to customize all areas of the default WordPress installation in this article.
Before we jump into the customization, let’s look at the plugin we’ll be using to customize the WordPress dashboard.
Ultimate Dashboard Pro: A One-Stop-Shop Solution to Customize WordPress Admin Dashboard
Ultimate Dashboard Pro is just the plugin you’d need to install on your website to give it a custom-tailored look. It’s built to help you completely take over your WordPress installation’s look, design, and functionality. Here are some of the most notable features:
- Customize the welcome panel.
- Add custom widgets or remove widgets from the dashboard page.
- Add or remove menu items in the left-hand admin menu.
- Customize the admin top bar.
- Entirely white label your WordPress website.
- Create a custom WordPress login page.
- Redirect users after login and much more…
So, before you begin, make sure you have the latest version of Ultimate Dashboard & Ultimate Dashboard Pro installed and activated on your website.
Let’s begin!
Customizing the WordPress Welcome Panel
To customize the welcome panel, go to Ultimate Dash… > Settings. Then, in the Dashboard widgets tab, scroll down and look for the Welcome panel. You will find the welcome panel loaded in WordPress classic editor.
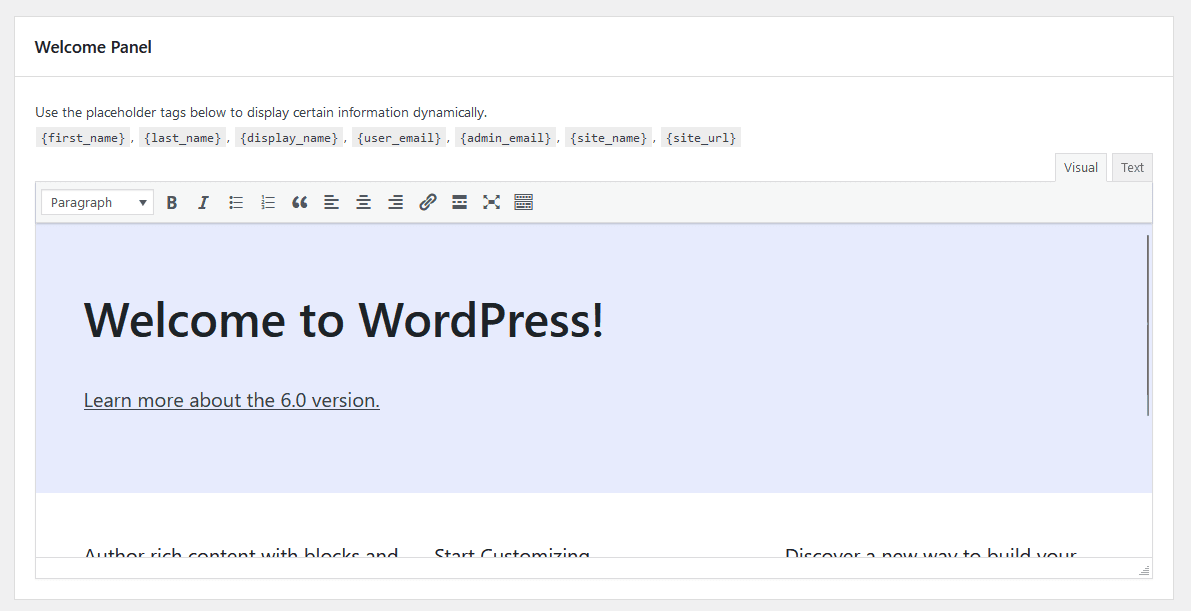
You can change the links, design, text, etc., within the classic editor, or if you’d prefer working with HTML, switch over to the text version.
You can even use dynamic placeholder tags to pull some data in dynamically. This allows you to build an even more customized user experience.
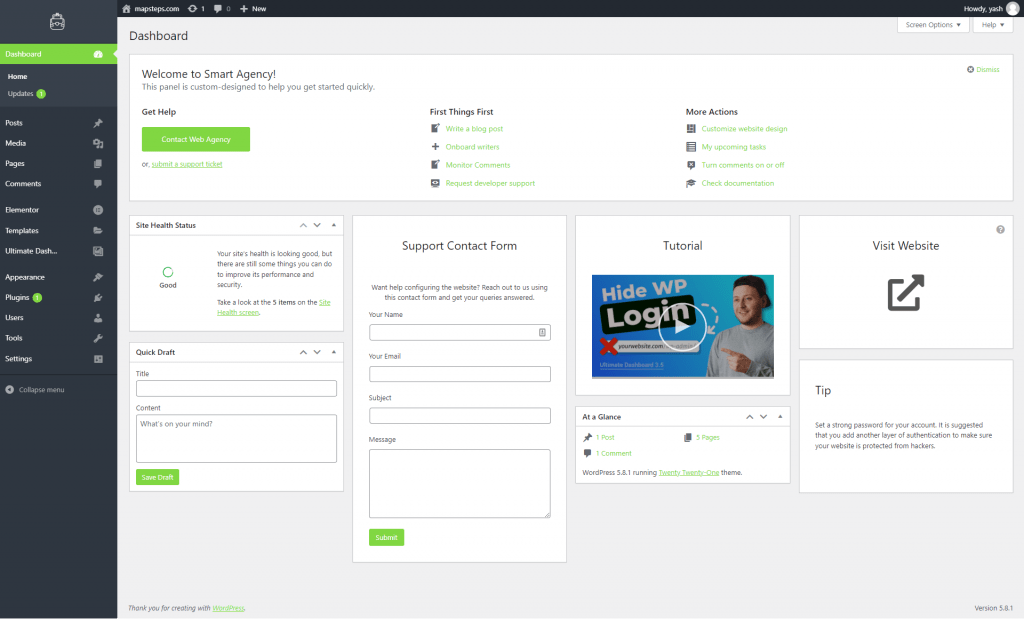
Once you are done, click on the Save button to make the changes live. This is what my design looks like:
Now let’s customize the widgets below the welcome panel.
Customizing the WordPress Dashboard Widgets
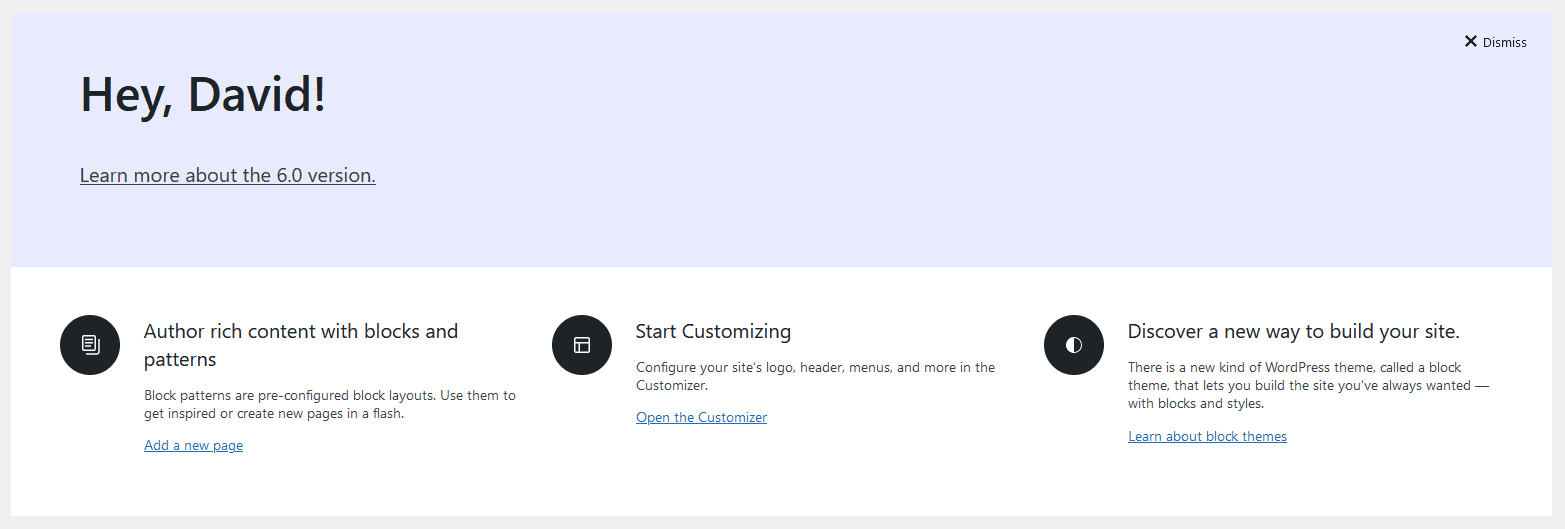
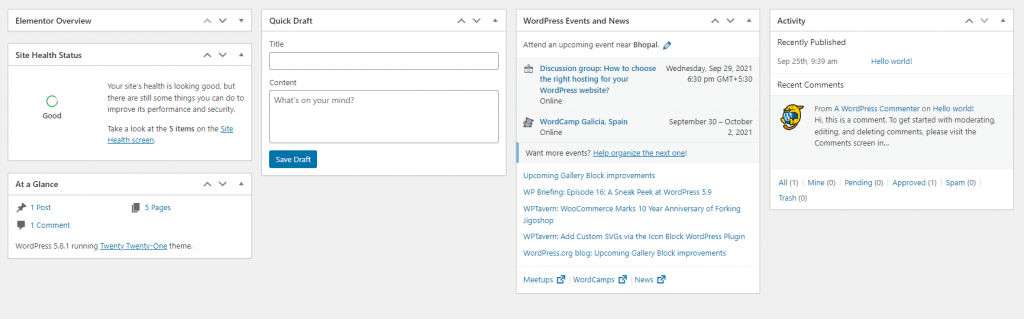
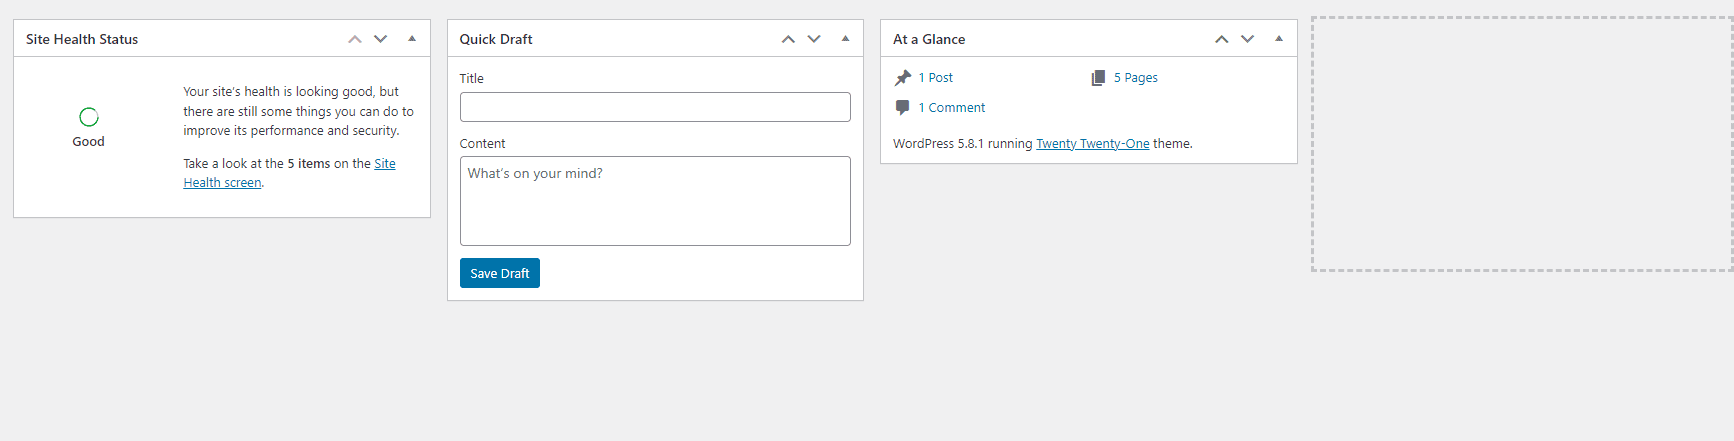
The default dashboard has different widgets which you can drag, drop and remove based on what you use the most. I have a few plugins installed on my website such as Elementor; this is what my dashboard widgets section looks like by default:
Let’s see how you can customize the widgets area.
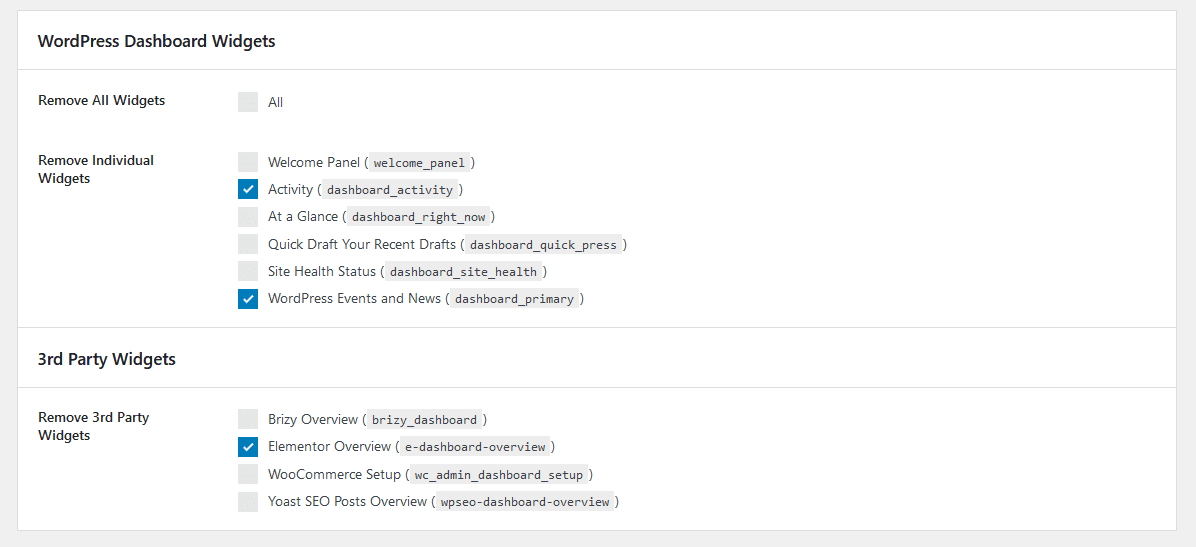
How to Remove Admin Dashboard Widgets
To remove unwanted widgets, you can go to Ultimate Dash… > Settings > Dashboard Widgets and remove the ones you don’t want by clicking on the checkboxes. Once done, click on the Save button at the bottom.
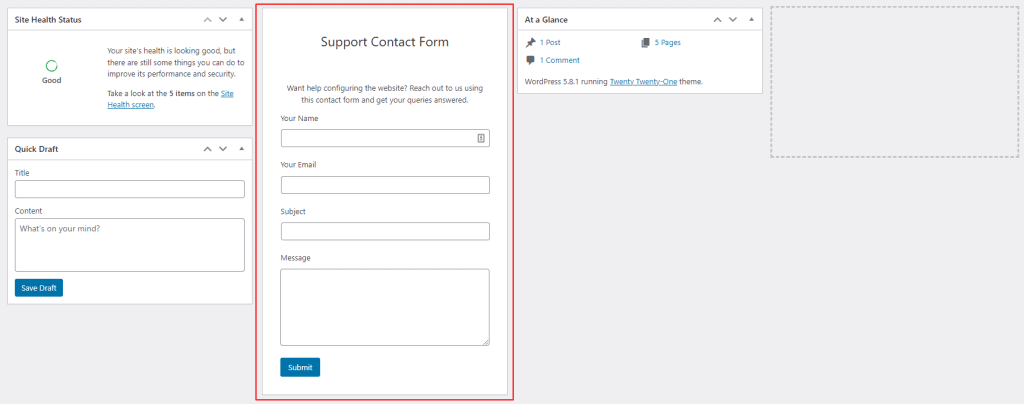
After getting rid of the unwanted widgets, let’s see how you can add new custom widgets to the dashboard.
How to Add New Custom Widgets to Admin Dashboard
Creating new widgets in Ultimate Dashboard is almost as easy as removing them. You get five different pre-designed widgets to choose from.
Go to Ultimate Dash… > Add New. This will start the process of adding a new widget.
Firstly, you need to select the Widget type. Then, you can add an Icon widget, Text widget, Video widget, HTML widget, and a Contact Form widget to your WordPress Dashboard.
For this tutorial, I’ll set up the contact form widget.
Here’s how:
- Select the widget type as Contact Form widget.
- Add a text description that will show up before the form.
- Customize the input fields (if needed).
- Customize the success message (if needed).
- If you want a confirmation autoresponder email being sent, you can enable it too. Just make sure you add the autoresponder text.
- Set up the email that will receive the contact form submission. You can go with the default email or select a different email.
- Position: Select whether you want the form to show on the first column or the second column. This isn’t as important as you can always re-arrange the widgets later on the actual Dashboard.
- Priority: define where the widget appears within the column. Similar to the position option, this can be changed by re-arranging the widget later.
- User Role Access: This setting is usefuil if you want to show this widget only to specific user roles.
- User Access: Use can display the widget only to specific users by selecting them from the list.
- Logging: You can even enable a logging feature to keep all emails stored in case something went wrong or an email didn’t send.

Once you’ve made all the changes, click on the publish button.
This is what the dashboard looks like after I’ve added a couple of custom widgets:
You can add as many widgets as you like by repeating the same process.
How to Customize the Admin Menu
The Admin Dashboard Menu is the menu on the left-hand side that you are greeted with when logging into your site. While the menu items depend on the logged-in user and their capabilities, you can further customize, extend or limit it for all users and user roles individually with Ultimate Dashboard.
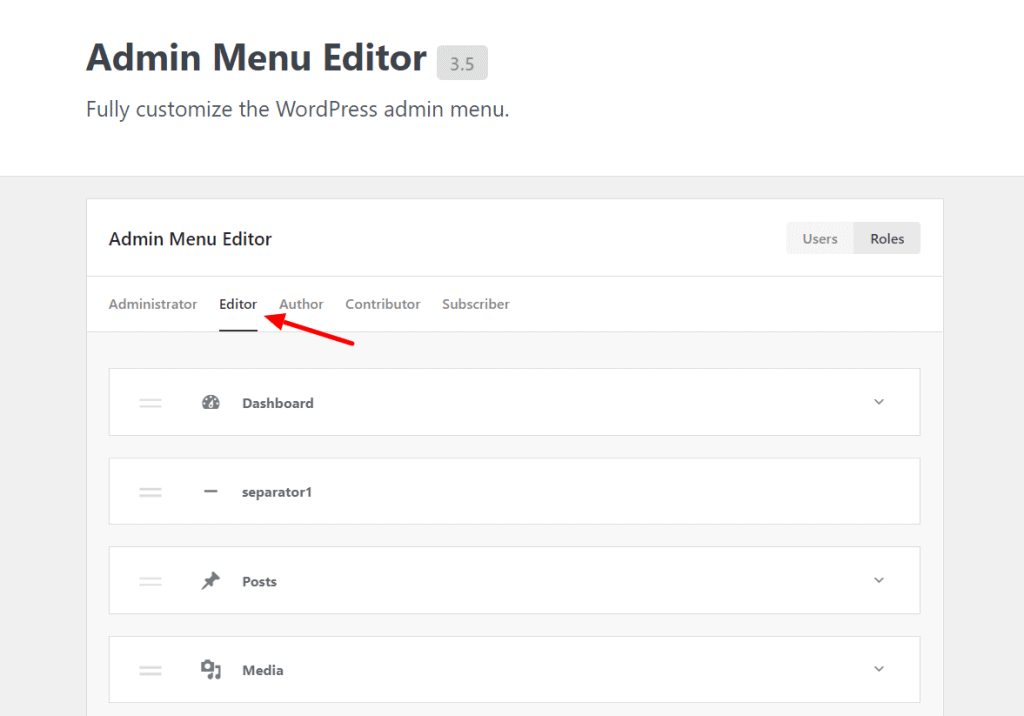
To customize the Admin menu, go to Ultimate Dash… > Admin Menu Editor.
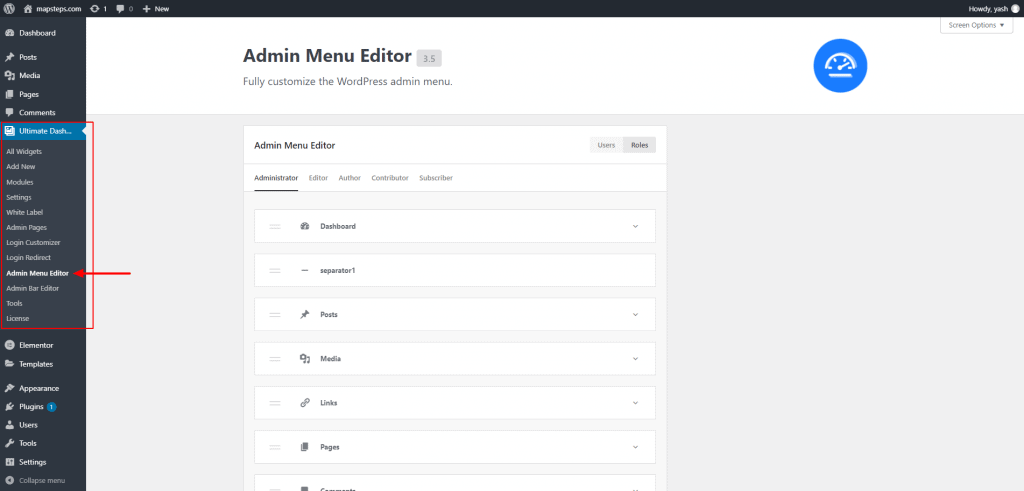
For example, if I want to add a Contact Agency support button to the bottom of the menu for editors only, here’s how I’d do it.
Click on the Editor tab and scroll down to the bottom.
Click on the Add Menu Item option. This will add a custom menu. Now give the menu item a proper name, URL, and icon.
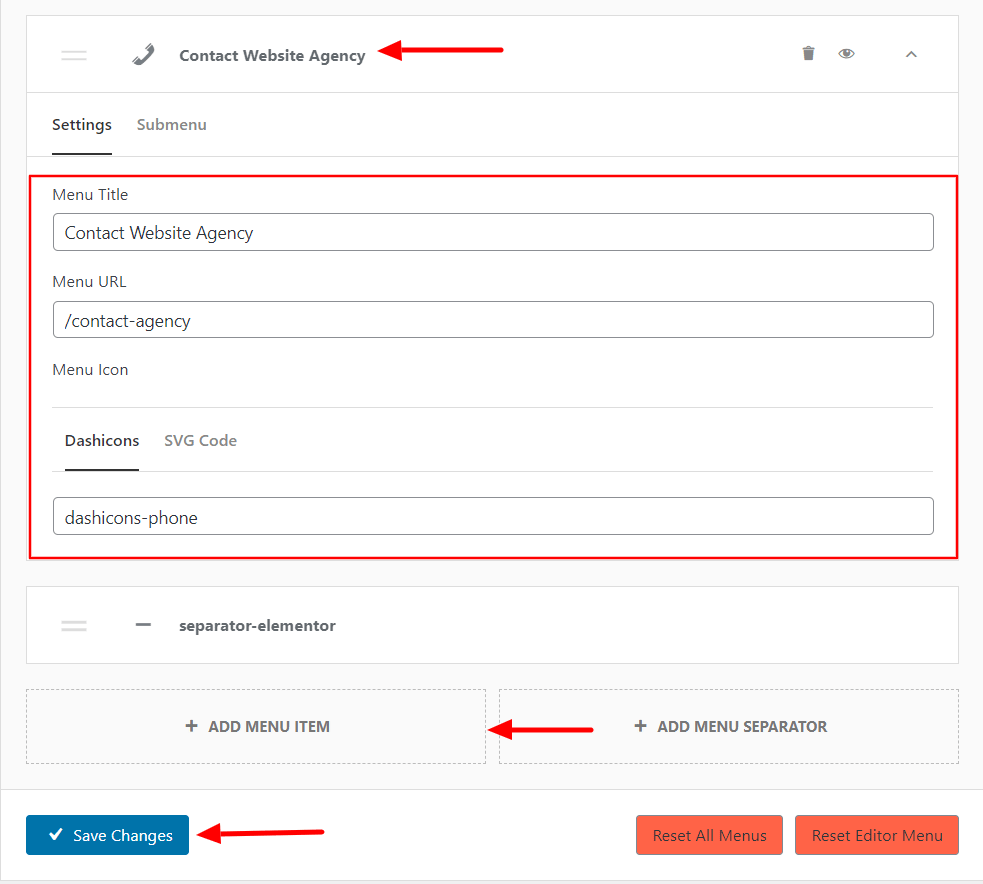
Once you’re done, simply click on the Save Changes button.
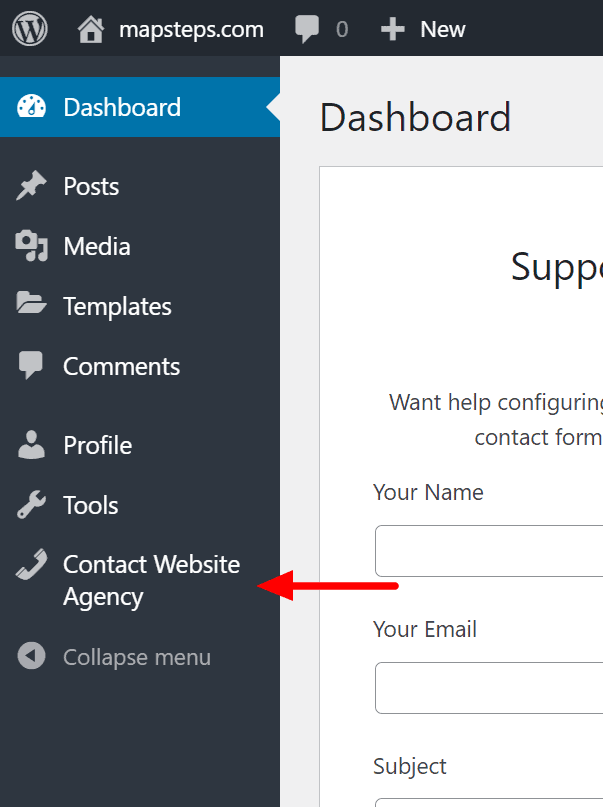
Here’s what that menu item looks like:
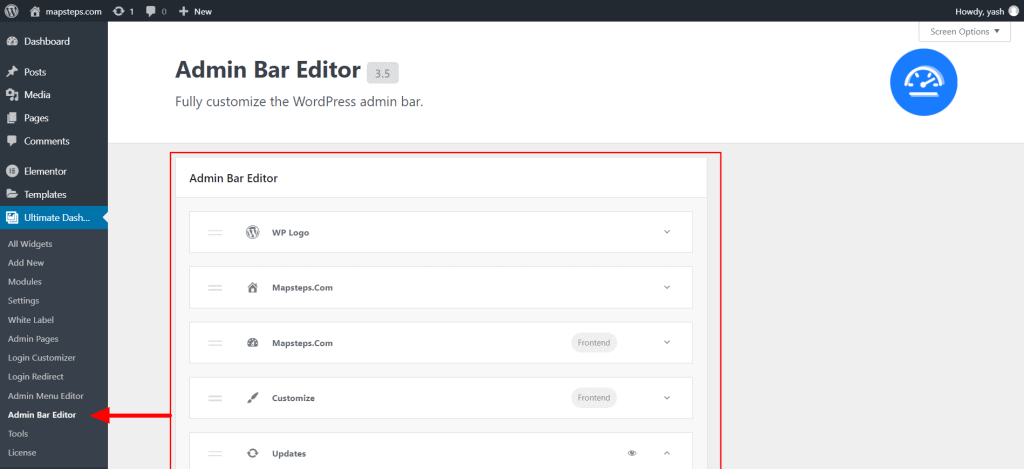
How to Customize the Admin Bar
Just like the Admin Dashboard Menu, you can customize the Admin menu as well. For this, navigate to Ultimate Dash… > Admin Bar Editor. Now make changes to the items that you want to customize.
You can hide admin menu items, rename menu items or change the target URL. In addition to that, you can also add new menu items to the Admin Bar. Of course, the same applies to the admin bar sub-menu items.
Changing the Default Admin Dashboard Colors
Another aspect of customizing the admin dashboard is to change the default colors [WordPress blue (#0073AA) and Ultra dark grey (#191E23)] to your agency’s brand colors.
You can do this by going navigating to Ultimate Dash… > White Label and enabling the WordPress Admin Branding checkbox.
With Ultimate Dashboard, you also get a modern design admin dashboard layout. You can apply this layout by selecting the option from the dropdown list.
To change the WordPress admin colors, you can define new colors for the accent color, menu item color, admin bar background color, and submenu background color.
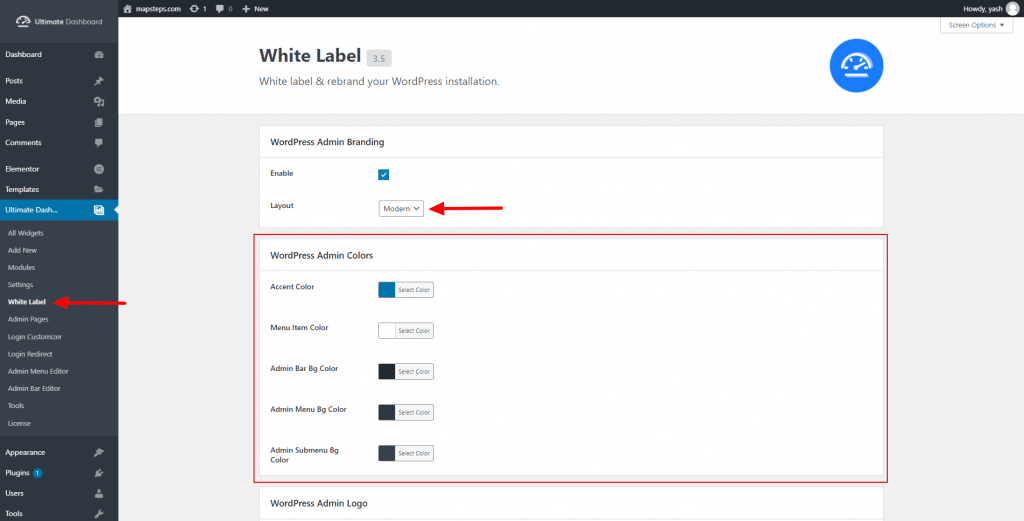
Once you’re done, click on the Save Changes button at the bottom of the page.
Here’s what the Admin dashboard looks like after making a few simple changes. You can even replace the default WordPress admin logo with your own.
Create a Custom WordPress Admin Dashboard Now!
Now it’s over to you! Customize your WordPress admin dashboard with Ultimate Dashboard & Ultimate Dashboard Pro.
Did you know? You can even customize the WordPress login page to give your users a complete personalized experience.
Let me know your thoughts on Ultimate Dashboard and its design capabilities. What feature should we add in the next update? We would love to hear your thoughts in the comments section below.
Leave a Reply